Install WordPress on Ubuntu 18.04 / 20.04 / 22.04 / 24.04 with Nginx & Let’s Encrypt SSL
This step-by-step guide shows you how to run one or many WordPress sites on a single Ubuntu server using Nginx, PHP-FPM and free SSL certificates from Let's Encrypt. It covers Ubuntu 18.04, 20.04, 22.04 and 24.04.
Most of my own websites run on WordPress. I build a lot of them to either sell on Flippa or keep long-term in the hope that they earn recurring revenue. The page you're reading right now uses exactly this setup: a virtual hosting server running Nginx on Ubuntu, serving around 20+ WordPress sites from a single DigitalOcean Droplet.
Over the years this stack has been fast, stable and cheap to run. I prefer Nginx over Apache for WordPress because it's lightweight, handles high concurrency well and makes it easy to host many domains on one server.
1) Install a LEMP stack (Linux, Nginx, MariaDB/MySQL, PHP-FPM)
2) Create an Nginx virtual host for your domain
3) Point DNS to your server
4) Install a free Let's Encrypt SSL certificate (per Ubuntu version)
5) Create a database for WordPress
6) Download WordPress and run the installer
7) Repeat for as many domains as you want on the same server
Step 0 – Install the LEMP stack (Nginx, MariaDB, PHP-FPM)
If your server already has Nginx, PHP-FPM and MariaDB/MySQL installed, you can skip to Step 1. Otherwise pick your Ubuntu version below and run the commands. You can copy each command line by line.
Ubuntu 18.04 – LEMP + PHP 7.4
sudo apt updatesudo apt install nginx -ysudo ufw allow 'Nginx Full'sudo apt install mariadb-server -ysudo mysql_secure_installationsudo apt install software-properties-common -ysudo add-apt-repository ppa:ondrej/php -ysudo apt updatesudo apt install php7.4-fpm php7.4-mysql php7.4-xml php7.4-curl php7.4-gd php7.4-mbstring php7.4-opcache php7.4-zip unzip -yPHP-FPM socket: /var/run/php/php7.4-fpm.sock
Ubuntu 20.04 – LEMP + PHP 7.4
sudo apt updatesudo apt install nginx mariadb-server unzip -ysudo ufw allow 'Nginx Full'sudo mysql_secure_installationsudo apt install php7.4-fpm php7.4-mysql php7.4-xml php7.4-curl php7.4-gd php7.4-mbstring php7.4-opcache php7.4-zip -yPHP-FPM socket: /var/run/php/php7.4-fpm.sock
Ubuntu 22.04 – LEMP + PHP 8.1
sudo apt updatesudo apt install nginx mariadb-server unzip -ysudo ufw allow 'Nginx Full'sudo mysql_secure_installationsudo apt install php8.1-fpm php8.1-mysql php8.1-xml php8.1-curl php8.1-gd php8.1-mbstring php8.1-opcache php8.1-zip -yPHP-FPM socket: /var/run/php/php8.1-fpm.sock
Ubuntu 24.04 – LEMP + PHP 8.3
sudo apt updatesudo apt install nginx mariadb-server unzip -ysudo ufw allow 'Nginx Full'sudo mysql_secure_installationsudo apt install php8.3-fpm php8.3-mysql php8.3-xml php8.3-curl php8.3-gd php8.3-mbstring php8.3-opcache php8.3-zip -yPHP-FPM socket: /var/run/php/php8.3-fpm.sock
Step 1 – Create a virtual host for your domain
In this guide we'll use example.com. Replace it with your own domain every time
you see it.
sudo mkdir -p /var/www/example.com/public_htmlsudo chown -R www-data:www-data /var/www/example.comCreate the Nginx server block:
sudo nano /etc/nginx/sites-available/example.comPaste this block, adjusting the PHP-FPM socket line for your version:
server {
    listen 80;
    listen [::]:80;

    server_name example.com www.example.com;
    root /var/www/example.com/public_html;
    index index.php index.html index.htm;

    client_max_body_size 100M;

    location / {
        try_files $uri $uri/ /index.php?$args;
    }

    location ~* \.(jpg|jpeg|png|gif|ico|css|js)$ {
        expires 365d;
    }

    # Update this for your PHP version
    location ~ \.php$ {
        include snippets/fastcgi-php.conf;
        fastcgi_pass unix:/var/run/php/php8.1-fpm.sock;
    }
}
Enable the site and reload Nginx:
sudo ln -s /etc/nginx/sites-available/example.com /etc/nginx/sites-enabled/sudo nginx -tsudo systemctl reload nginxStep 2 – Configure DNS for your domain
In your domain registrar or DNS host, create:
- A record:
example.com→ your server's IP address - CNAME:
www→example.com


www.ping example.com resolves to your server IP,
you're ready for SSL.
Step 3 – Install Let’s Encrypt SSL (per Ubuntu version)
The recommended way to install Certbot is slightly different between Ubuntu releases. Choose your version below and follow the commands line by line.
Ubuntu 18.04 – Certbot from PPA
sudo add-apt-repository ppa:certbot/certbot -ysudo apt updatesudo apt install python-certbot-nginx -ysudo ufw allow 'Nginx Full'sudo systemctl reload nginxUbuntu 20.04 – Certbot from apt
sudo apt updatesudo apt install certbot python3-certbot-nginx -ysudo ufw allow 'Nginx Full'sudo systemctl reload nginxUbuntu 22.04 & 24.04 – Certbot via Snap (recommended)
sudo snap install core; sudo snap refresh coresudo snap install --classic certbotsudo ln -s /snap/bin/certbot /usr/bin/certbotsudo ufw allow 'Nginx Full'sudo systemctl reload nginxRequest your SSL certificate (all versions)
Once Certbot is installed, use the same command on any Ubuntu version:
sudo certbot --nginx -d example.com -d www.example.comFollow the prompts and when asked, choose option 2: Redirect so that all HTTP traffic is automatically redirected to HTTPS.
sudo certbot renew --dry-run
Step 4 – Install ZIP / UNZIP tools
We'll need these to unpack WordPress:
sudo apt install zip unzip -yStep 5 – Download WordPress files to your server
Move into your website's document root:
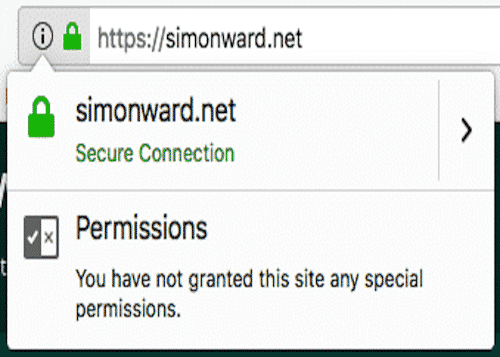
cd /var/www/example.com/public_htmlDownload my pre-packaged WordPress archive and unzip it:
sudo wget https://simonward.net/wp.zipsudo unzip wp.zipStep 6 – Create a MySQL / MariaDB database for WordPress
Log into MySQL as root:
mysql -u root -pInside the MySQL prompt, create a database and user (change the values):
CREATE DATABASE databasename CHARACTER SET utf8mb4 COLLATE utf8mb4_unicode_ci;CREATE USER 'databaseuser'@'localhost' IDENTIFIED BY 'databasepassword';GRANT ALL PRIVILEGES ON databasename.* TO 'databaseuser'@'localhost';FLUSH PRIVILEGES;EXIT;Step 7 – Fix file ownership and permissions
Give Nginx/PHP (the www-data user) ownership of your site's files:
sudo chown -R www-data:www-data /var/www/example.comStep 8 – Run the WordPress installer
Open your site in a browser:
https://example.com
You should see the WordPress installation wizard. Enter the database details you created in Step 6, choose a site title, admin username and password, and complete the setup.
At this point you have a fully working, SSL-secured WordPress site running on Nginx and Ubuntu.
How I host 20+ WordPress sites on one server (and how you can too)
On my own DigitalOcean Droplet I run more than 20 WordPress sites: small niche sites, experiments, and projects I sometimes sell on Flippa. Each site follows the exact pattern in this guide:
- New folder:
/var/www/newdomain.com/public_html - New Nginx server block for
newdomain.com - New DNS A + CNAME records
- Run Certbot just for that domain:
sudo certbot --nginx -d newdomain.com -d www.newdomain.com- Create a new database and user for that site
- Download/unzip WordPress into that domain's
public_html - Run the WordPress installer
Because Nginx is efficient and PHP-FPM pools are shared, a modest Droplet happily handles many low-traffic sites. When a single site grows, it's easy to move that one to its own bigger server.
Why I use Nginx & DigitalOcean for WordPress
Nginx vs Apache for WordPress
- Performance: Nginx handles static files and concurrent connections very efficiently.
- Low memory use: Perfect for running lots of smaller sites on one box.
- Simple virtual hosts: Easy to add new domains and SSL certificates.
Why DigitalOcean
- Simple pricing and quick snapshots/backups.
- Easy to scale up when a site takes off.
- Reliable network – I've run this setup for years with very little downtime.
If you want to try the same platform I use, you can get free credit for new accounts here:
Get $200 Free DigitalOcean Credit
Remember, if you don't already have a DigitalOcean account, you can get $200 free credit using my referral link below:
👉 Click here to claim $200 DigitalOcean credit
I use DigitalOcean for nearly all of my WordPress and Nginx servers, including the exact setup shown in this guide. It's fast, reliable, and perfect for running Postfix email forwarding.
Optional: Configure Postfix email forwarding
To forward [email protected] to your main inbox you can follow my
Postfix email forwarding guide:
FAQ – WordPress on Ubuntu Nginx with Let’s Encrypt
- Can I use this on a small $5–$6 Droplet?
- Yes. That's exactly how I host many of my smaller sites. As traffic grows you can resize or move heavy sites to their own server.
- Which PHP version should I choose?
- On Ubuntu 22.04+ it's best to use the default PHP version (8.1 or 8.3 at the time of writing) for performance and security. On older releases PHP 7.4 is still fine for most WordPress sites.
- How do I force everything to HTTPS?
- When running Certbot choose the Redirect option. It updates your Nginx config so all HTTP requests are redirected to HTTPS automatically.
- Can I run non-WordPress sites on the same server?
- Yes – just create more Nginx server blocks pointing to different directories and skip the WordPress-specific steps.