Install WordPress on Ubuntu 16.04–24.04 with LAMP (Apache, MySQL, PHP)
This guide shows you how to install WordPress on a LAMP stack (Linux, Apache, MySQL/MariaDB and PHP) on Ubuntu 16.04, 18.04, 20.04, 22.04 and 24.04 using SSH and the command line.
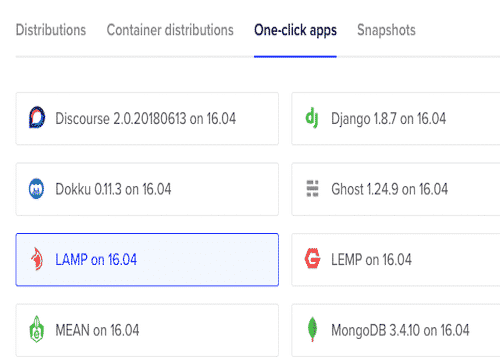
Although you can spin up a WordPress droplet with a one-click app, I prefer to install it manually. That way I can run multiple WordPress sites on a single server, tune the stack exactly how I like, and reuse the same setup for new projects or sites I sell on Flippa.
Most of my WordPress installs run on small Ubuntu LAMP droplets (Apache + PHP + MySQL/MariaDB). This page is the updated version of my original Ubuntu 16.04 guide, expanded to cover Ubuntu 16.04 all the way through to 24.04.
1) Install the LAMP stack (per Ubuntu version)
2) Enable Apache rewrite and configure a virtual host
3) Download and copy WordPress into place
4) Create a MySQL/MariaDB database and user
5) Fix file permissions and configure
wp-config.php6) Run the WordPress installer in your browser
7) Repeat for more domains on the same server
Step 0 – Install the LAMP stack (per Ubuntu version)
If your server already has Apache, MySQL/MariaDB and PHP installed and working, you can skip this step. Otherwise choose your Ubuntu version below and run each command line by line.
Ubuntu 16.04 – LAMP
sudo apt-get updatesudo apt-get install apache2 mysql-server php libapache2-mod-php php-mysql php-xml php-curl php-gd php-mbstring php-zip unzip -ysudo mysql_secure_installationUbuntu 18.04 – LAMP
sudo apt updatesudo apt install apache2 mysql-server php libapache2-mod-php php-mysql php-xml php-curl php-gd php-mbstring php-zip unzip -ysudo mysql_secure_installationUbuntu 20.04 – LAMP
sudo apt updatesudo apt install apache2 mysql-server php libapache2-mod-php php-mysql php-xml php-curl php-gd php-mbstring php-zip unzip -ysudo mysql_secure_installationUbuntu 22.04 – LAMP
sudo apt updatesudo apt install apache2 mysql-server php libapache2-mod-php php-mysql php-xml php-curl php-gd php-mbstring php-zip unzip -ysudo mysql_secure_installationUbuntu 24.04 – LAMP
sudo apt updatesudo apt install apache2 mysql-server php libapache2-mod-php php-mysql php-xml php-curl php-gd php-mbstring php-zip unzip -ysudo mysql_secure_installationStep 1 – Enable Apache rewrite & .htaccess support
WordPress needs "pretty permalinks" which rely on .htaccess and Apache's rewrite module.
Edit /etc/apache2/apache2.conf and allow overrides in the web root.
sudo nano /etc/apache2/apache2.confFind the
Now enable the rewrite module and restart Apache:
sudo a2enmod rewritesudo systemctl restart apache2Step 2 – Create an Apache virtual host for your domain
In this guide we'll use example.com. Replace it with your own domain name
everywhere you see it.
Create the document root and set ownership:
sudo mkdir -p /var/www/example.com/public_htmlsudo chown -R www-data:www-data /var/www/example.comCreate a new virtual host config file:
sudo nano /etc/apache2/sites-available/example.com.confPaste this configuration:
    ServerName example.com
    ServerAlias www.example.com

    DocumentRoot /var/www/example.com/public_html


        AllowOverride All
        Require all granted


    ErrorLog ${APACHE_LOG_DIR}/example.com-error.log
    CustomLog ${APACHE_LOG_DIR}/example.com-access.log combined
Enable the site and disable the default site, then reload Apache:
sudo a2ensite example.com.confsudo a2dissite 000-default.confsudo systemctl reload apache2
Make sure DNS for example.com points to your server's IP. Once you can load
http://example.com and see either a blank page or Apache test page in that directory,
you're ready to install WordPress.
Step 3 – Download & prepare WordPress
We'll download WordPress into /tmp, prepare permissions, then copy it into the site root.
cd /tmpcurl -O https://wordpress.org/latest.tar.gztar xzvf latest.tar.gztouch /tmp/wordpress/.htaccesschmod 660 /tmp/wordpress/.htaccesscp /tmp/wordpress/wp-config-sample.php /tmp/wordpress/wp-config.phpmkdir /tmp/wordpress/wp-content/upgradesudo cp -a /tmp/wordpress/. /var/www/example.com/public_htmlStep 4 – Create the WordPress database & user
Log into MySQL or MariaDB as the root user:
mysql -u root -pInside the MySQL prompt, create a database and user (change the values):
CREATE DATABASE wordpress CHARACTER SET utf8mb4 COLLATE utf8mb4_unicode_ci;CREATE USER 'wpuser'@'localhost' IDENTIFIED BY 'strongpassword';GRANT ALL PRIVILEGES ON wordpress.* TO 'wpuser'@'localhost';FLUSH PRIVILEGES;EXIT;wp-config.php and the WordPress installer.
Step 5 – Fix file permissions
Give the web server user (www-data) ownership of your site's files:
sudo chown -R www-data:www-data /var/www/example.comOptional extra hardening similar to your original guide:
sudo find /var/www/example.com/public_html -type d -exec chmod g+s {} \;sudo chmod g+w /var/www/example.com/public_html/wp-contentsudo chmod -R g+w /var/www/example.com/public_html/wp-content/themessudo chmod -R g+w /var/www/example.com/public_html/wp-content/pluginsStep 6 – Configure wp-config.php
Edit your wp-config.php file in the site root:
sudo nano /var/www/example.com/public_html/wp-config.phpUpdate the database settings:
define( 'DB_NAME', 'wordpress' );
define( 'DB_USER', 'wpuser' );
define( 'DB_PASSWORD', 'strongpassword' );
define( 'DB_HOST', 'localhost' );
define( 'DB_CHARSET', 'utf8mb4' );
define( 'DB_COLLATE', '' );
Next, generate fresh security keys (salts) from WordPress.org in your terminal:
curl -s https://api.wordpress.org/secret-key/1.1/salt/
Copy the output and paste it over the existing AUTH_KEY, SECURE_AUTH_KEY,
etc. values in wp-config.php, then save and exit.
Step 7 – Run the WordPress installer
Open your domain in a browser:
http://example.com (or https://example.com if you've already added SSL)
You should see the WordPress installation wizard. Follow the prompts, choose a site title, admin username and password, and finish the installation.
That's it – you now have a working WordPress site running on Ubuntu with a LAMP stack.
Hosting multiple WordPress sites on one LAMP server
This setup is ideal for hosting multiple low-traffic WordPress sites on a single droplet or VPS. For each new site you want to add:
- Create a new document root, e.g.
/var/www/newdomain.com/public_html - Create a new Apache virtual host for that domain
- Point DNS A records for the domain to your server
- Download and copy a fresh WordPress install into that directory
- Create a new database and user for that site
- Run the WordPress installer for the new domain
For a full walkthrough of the multi-site idea, see my original guide: Host Multiple Websites on Ubuntu 16.04 with LAMP .
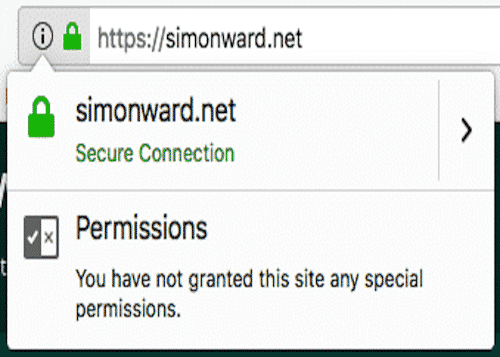
Add free SSL with Let’s Encrypt
It's almost compulsory these days to run all websites over HTTPS. Modern browsers warn users about non-secure sites, and search engines prefer HTTPS in the results.
Once you've installed WordPress, you can follow my dedicated guide to install a free Let's Encrypt SSL certificate for Apache on Ubuntu 16.04–24.04:
How to Install Let's Encrypt SSL on Ubuntu (16.04–24.04) – Apache & Nginx Guide
Get $200 Free DigitalOcean Credit
Remember, if you don't already have a DigitalOcean account, you can get $200 free credit using my referral link below:
👉 Click here to claim $200 DigitalOcean credit
I use DigitalOcean for nearly all of my WordPress and Nginx servers, including the exact setup shown in this guide. It's fast, reliable, and perfect for running Postfix email forwarding.